Category: Tools

  • Re-purposing a Box—Part 2, Deconstruction

    The first step in working on a piece—like this rather forlorn, century-old box—is a good assessment. Sometimes this requires nothing more than our five senses and experience.

    1. Assessment

    In this case, we know right away that the interior is irredeemable. The edges are quite thread-bare, and the cloth smells strongly of mice. In our experience with pianos, one thing which will never fade from our olfactory memories is the smell of mouse pee: it sinks in to, and never comes out of, textiles. So, we know that the green velvet has to go!

    A Sad and Forlorn Box

    Happily, the rest of the box is in great condition. The corners are still strongly glued, and were originally re-inforced with splines. While not as strong as dovetails, this is still quite a good construction technique, and it has served this box well for over a century. The hardware is original, and of solid brass. The key is missing, which we can deal with. There is a lid stay which prevents stress on the hinges, which again is a condition-saving extra in a box like this. The original burlap on the bottom is also worn, and is coming free.

    A Sad and Forlorn Box

    A Sad and Forlorn Box

    The original finish is intact, although the shellac has seen some losses. Happily the finish on the interior tray is fabulous: shiny and full of warm colour. This gives us, and the box’s future owners, a feel for the original designer’s intent and execution in finishing. One of our pet peeves in the antiques business is dealers who slap a coat of polyurethane on everything they sell, thinking that this is ‘a nice finish for antiques’. A beautiful, warm, example of original 19th century shellac finish like this shows just how dull, yellowed, and obscene that practice is.

    Our conclusion: this box is in rough condition, but well worth the effort in saving.

    2. De-construction

    The first step in de-construction is to carefully remove the hardware. We label everything, and keep it in ziplock bags, to avoid wandering bits & pieces.

    A Sad and Forlorn Box

    Because the original adhesive used was hide glue, it is easy to loosen the interior fittings. After about sixty years, it can become brittle, especially in non-wood applications like this, where there is exposure to the air. We carefully pull off the interior fittings, with a view to learning how the original makers did their work. That way, we can imitate their methods, using suitable replacement materials.

    A Sad and Forlorn Box

    With some persuasion, the velvet-lined panels pop right off, revealing a base of cardboard. We can match their overall thickness, even if we use different materials to replace them. Good records are important, even in the smallest project. Details like this mean that the interior tray will fit just as well when we are done as it did originally.

    Because the exterior of the tray is so well-preserved, it will require minimal effort. The bottom is covered with black paper, and this just needs the corners re-glued. The leather pull-tabs are perfect in condition, size, and softness, with no trace of rot or hardening; we will leave them in place for another hundred years.

    A Sad and Forlorn Box

    The panels in the main compartment are constructed similarly. However, the rests on which the tray sits are actually separately covered pieces of pine, glued to the wider cardboard-based pieces which are, in turn, glued to the sides. Pine is a very open-pored wood, which means that it will have absorbed—you guessed it!—mouse pee. We will have to fabricate new tray-rests, using wood as originally done. And again, we make a note of thicknesses and other dimensions, so that everything will fit properly when we are done.

    As a point of interest, the pine-and-cardboard dual panels in the bottom are also nailed in place, although rather half-heartedly. Perhaps the manufacturer didn’t want to wait for all that glue to dry between each step? This reminds us that assembly lines and efficiency-over-craftsmanship was never limited to the 20th century.

    3. Ready for the Next Step

    Finally, we have stripped the old fabric away, recording the shapes and sizes of everything we will dispose of. The hardware is carefully stored away. Old glue residue has been scraped off, and everything is ready for re-covering. We are ready for the next step: the exterior finish, which will be the subject of our next blog entry.

  • Re-purposing a Box—Part 1

    One of the things we enjoy about restoration and conservation is that sometimes you come into an artifact that is sad and forlorn; whether it be due to damage, humility, or other reasons, there is no reason to conserve it, and it just isn’t sensible to do a full restoration. However, that doesn’t mean that such an item is beyond hope. And that is where the fun begins! The box we feature here is just such a case, and is an excellent candidate for showcasing how to re-purpose what was once a beautiful and functional piece.

    A Sad and Forlorn Box
    A small and forlorn box…
    A Sad and Forlorn Box
    …with a shallow tray…
    A Sad and Forlorn Box
    …and a storage space beneath.

    In the world of material culture professionals, re-purposing is a last resort. An artifact must have no historical significance in and of itself. It must not be usable within an existing collection, or there must be other, better quality, examples already held.

    “Re-purposing” is often antique-dealer double-speak for a shoddy attempt at making a piece of junk sell-able. When done with care, skill, and high-quality materials, however, re-purposing can take something in poor condition and make it beautiful and useful again.

    We came across this small box at an antique market this spring. Typical of such boxes produced in the late 1800s, it was once used for holding either jewellery, sewing, or both. However, it had no immediate cultural context: no owner’s name was evident, and it had been removed from wherever it had originally been kept, never to return. Sadly, as is also typical, it was in rough shape. The interior fittings were in terrible condition. The glue was crumbling, the velvet was coming off and was permeated with the smell of mouse pee.

    We have, then, decided to take this somewhat forlorn box, and make it anew. It’s bones are good: quarter-sawn oak, joined with splined mitres at the corners. The hardware is the original sensible, solid brass, and in excellent condition. The interior tray is in beautiful shape. The only big question is, what should it become? Jewellery and sewing boxes abound, even in this 21st century. However, it’s size is perfect for something harder to find: a fountain pen & stationery storage box.

    Over the next few weeks we will post a diary of the restoration/re-purposing of this box, including details of our techniques, and what materials we are using. Hopefully you will find it interesting, at the very least. At the most, we hope that someone else can use these methods to repair, restore—or even resurrect anew—something sad and forlorn that they have found or inherited.

  • Breakdown of a 1946 Yard-o-Led Pencil

    We recently had a batch of vintage Yard-o-led propelling pencils sent to us for repair and restoration. One in particular was such an excellent example of what makes these pencils so outstanding that we thought we would share it with all of you.

    Since Samson Mordan patented the first helically-driven propelling pencil in 1832, not much has been done to improve on his original design. Yard-o-Led, established in 1934, used Mordan‘s basic design, but made several improvements (which we will point out as we go along.) In the earliest days of the company, their manufacturing was outsourced to Johnson Matthey & Co, thus the “JM&Co” hallmark on pencils like this one.

    Yard-o-led products come with a famous lifetime warranty, and this information is not meant to replace the care of a qualified technician. If you have a Yard-o-led pencil, we encourage you to contact them and arrange for service that way.

    However, there may be occasions when you want to do some work on your pencil yourself, or when you feel that it would not be appropriate to assume their warranty would apply (such as destructive damage due to abuse, or coming into several parts pencils which could be combined into a working one.) In the interests of education, and to help foster an appreciation for the fine workmanship produced by this company for decades, we are happy to provide this information.

    I. An Overview
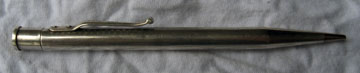
    Yard-o-Led Pencil

    So here we have a typical Yard-o-led pencil of the era, in sterling silver, hallmarked for 1946. It is round in cross-section (other models were triangular, square, and hexagonal), and 117 mm (4 5/8″) long. This particular model has a brass nozzle (where the lead comes out), and a clip which is riveted to the body (earlier models had a loose clip, held in place by the retaining nut, which we will talk about below.) (note: the clip in the photo is sprung a bit; we tightened it up later on. There should be no space between the clip and the pencil’s body.)

    II. Simple Dis-assembly

    These pencils are meant to come apart to a certain extent, which is one great advantage to Yard-o-led products. It means that any owner can carry out basic maintenance, including cleaning and drying (more on the importance of drying things out later.)

    The first step in simple dis-assembly is to unscrew the nozzle (although not all models had a removeable nozzle.) It should be on tight enough that you have to use a piece of rubber to grip it hard enough to unscrew it. Sometimes a bit of heat can be used to break any corrosion bonds—pass the end through a heat gun until it is warm to the touch. If neither of these methods work, don’t force it. It may have been cross-threaded in place by someone careless, and in that case not much can be done but to leave it be.

    Yard-o-Led Pencil

    On the other end, retract the lead as far as you can. Then, pull up the plunger/drive shaft assembly as far as it will go. Loosen the retaining nut off completely, and then twist the drive shaft out of the pencil body. (In the photo below, the brass baffles for the storage silos have also started to pull out. That almost never happens—I loosened them before I took the photos.)

    Yard-o-Led Pencil

    You should end up with: the pencil body; the unthreaded nozzle; the drive tube/plunger assembly; the retaining nut, probably still on the shaft.

    III. Not-So-Simple Dis-assembly

    Now for the more difficult part. Because there are brass parts inside the pencil, and because brass tends to corrode into a greater volume than when it began (unlike silver, which just changes colour), things tend to get stuck together. We take a couple of simple steps to clean and loosen things up. First, we soak the barrel in warm vinegar (known as a pickle solution in the metalsmithing trade), which dissolves any corrosion. Second, we run it through an ultrasonic cleaner, which vibrates off any dirt or muck quite effectively. One reason this pencil is before you now, is that it was looked after: kept dry and clean. There was very little dirt or corrosion cementing the pieces together, and the inner workings literally just lifted out:

    Yard-o-Led Pencil

    The threaded propulsion tube is enclosed by the storage baffles, which are thin brass, press-fit together into one piece. The easiest and safest way to try and get this out is to replace the retaining nut, and use it as a handle to gently pull on the assembly, trying to gently work it loose. Again, soaking and/or gentle heat can help. However, the barrel and threaded tube are so thin that they can be easily damaged. Sometimes this part just cannot be safely removed. Often the storage baffles will come out, but again be careful, as they are easily deformed.

    Yard-o-Led Pencil

    The storage baffles are loosely held around the inner drive tube. If you can get them out, then they can be pickled in warm vinegar and rubbed with the finest of steel wool to clean them. A small test-tube brush can be used to clean the interior. This cleaning and polishing goes a long way to rehabilitating the lead storage silos, and is often all that is needed to keep access to the full “yard” of storage capacity.

    Yard-o-Led Pencil

    If we take a look at the cone, we can see where some of the only soldering is on these pencils: where the cone fits over the drive tube. This is why we are careful about using heat to loosen the inner assembly or the nozzle. Lead solder melts at around 176ºC (349ºF), and it is very difficult to re-solder brass and silver accurately again! This is also why we can’t just drop one of these pencils into a silver pickling solution: the tin in the solder will muck up the pickle, and the steel spring (which we will show you later) will actually copper-plate your pencil! So, vinegar, the ultrasonic cleaner, and steel wool are again the best cleaning agents.

    You will notice the slot milled along one section of the cone. This is so that it can get past the clip rivet. One sign of quality in the Yard-o-ledpencils is that, rather than just using two wee rivets to hold the clip in place on the body, they used a more robust system. Inside the barrel is actually a small bar of silver, parallel to the tube, with the two rivets projecting out of it, through the body, and through the clip. These two rivets are then hammered out to hold the clip in place. Thus, the clip is held in place by one large, long, solid piece of metal, which is why it rarely works loose. Our hats should go off to Yard-o-led for choosing good engineering over cheap expedience!

    IV. Shuttling About

    To round out our understanding of these pencils, we need to examine the shuttle: the bit which actually holds the lead and moves it up and down the drive tube. And a picture is worth a thousand words:

    Yard-o-Led Pencil

    The three bumps which protrude from the slot in the shaft engage in the threads of the drive tube. When you twist the finial, the shuttle moves up and down, following the threads. This is Samson Mordan’s genius at work, and simple machinery at it’s best! For the purposes of demonstration, we have placed two parts removed from other pencils next to the mechanism from this one.

    Yard-o-Led Pencil

    A closer look shows us that the shuttle itself is made up of three pieces: the outer shuttle, the inner shaft, and a steel spring (the only steel in these pencils.) The shuttle body holds the lead in place (sometimes this gets bent or loosened. It can be re-shaped to hold leads more firmly if necessary.) The brass inner shaft both engages the drive threads and serves to expel the lead from the socket when the mechanism is fully extended. The spring serves to ensure that the lead is only expelled at that point of full extension. AS you can see, the inner shaft is held in place by two tiny folds of silver at the mid-point of the shuttle body.

    The steel spring is one reason why it is so important to limit water exposure. Because of it’s small size, it will rust very quickly. And because the barrel is completely enclosed, evaporation is very limited. So, washing a pencil is guaranteed to shorten the lifespan of the entire ejection mechanism. (If a pencil does get flooded, compressed air is the best way to dry it out. WD-40 is a water dispersal agent, but it is greasy and stinky, can collect dust and muck over time, and should not be used. Only use a good graphite lubricant for mechanical pencils, and only use a dry graphite lube for any vintage pencil with plastic parts.

    V. Body Work

    With the pencil apart like this, it is a great opportunity to look at the body. A good set of mandrels is indispensable is servicing pencils; a set of machinists’ “transfer punches” is perfect. In this case, as soon as I slid the mandrel into the end of the barrel it was plain to see that it was slightly out-of-round, which effectively prevented one third of the barrel from being used for lead storage. A little quick re-shaping with a wee teflon-faced hammer fixed that problem. A mandrel just smaller than the diameter of the clip rivet worked well to support the minimization of some dents.

    Any time we do work on sterling silver (a portion of which is copper), and gold alloys for that matter, we have to keep a few metallurgical principles in mind. Any copper alloy will harden the more it is worked; the crystal lattice of the metal is literally compacting more and more, to the ultimate point where it will fracture. This means that any dents are harder than the surrounding metal. So, if you simply push on a dent, the tendency will be for the surrounding metal to rise up, so that you end up with an in-dentation within an out-dentation. The entire area to be worked must be fully supported, and the best method is to roll out the dent, rather than hammering. (As a quick aside, one reason you often see dents just above the cone of these pencils is that they are so well supported inside by the cone at the tip of the drive tube. At the point at which the support is gone, the dent-causing force collapses the thin tubing making up the body.)

    One means of avoiding metal stress in copper alloys, and of equalizing the hardness of the worked and non-worked areas is to anneal it, heating it to red hot with a blow torch. This process can only soften the metal, and will never harden it. However, because copper transmits heat so efficiently, the entire area of this thin metal tube will quickly become very soft. This may make for easy dent removal, but also makes for huge vulnerability to future denting. When we say soft, think of the consistency of refrigerated butter! This can also make any decorative pattern cut into the body more prone to wear.

    So, when it comes to dent removal, balancing aesthetics with wear-resistance is vital. Sometimes you just have to put up with scars.

    VI. The Complete Picture

    Yard-o-Led Pencil

    So here are all of the parts of this 1946 Yard-o-led pencil, broken down. We could conceivably de-solder the cone from the threaded drive tube, but that shouldn’t be necessary too often. To reassemble the pencil, we can simply follow the steps backwards.

    Yard-o-led made, and still makes, an excellent, world-class pencil. They are simple enough to be robust, and complex enough to do the job well. With a little care and thought, many forgotten or abused pencils can be brought back to life for more decades of service.

    Our thanks to Irvine, for his kind permission to use his pencil in this post.

  • On Hide Glue

    With the sheer number of adhesives peering at us from every hardware store’s shelves, it is hard to believe that most glues seen on antiques fall into only one category: animal. Hide glues were used extensively, and almost exclusively, until the mid-twentieth century, when aliphatic resin glues were developed. Even today, with a plethora of choices, hide glue is irreplaceable in the shop.

    But why would anyone be willing to use glue made from an animal? What qualities make hide glue useful, when so many other products are out there?

    Animal-based glues take advantage of a wonder of the natural world: collagen. This is the gelatinous substance which literally holds all of us together: a protein which is the foundation of skin, bones, tendons, cartilage, and hooves (for those of us who sport those.) The oldest example of hide glue is about 8,000 years old.

    Collagens are easily processed out of the waste products from meat packing plants, using heat and water. When dried and pelletized, hide glue keeps indefinitely. Liquid, ready-to-use hide glues have a shelf life of about a year.

    What are some of the working advantages of hide glue? Here are a few:

    • tack: parts stay put with minimal clamping, and joints actually close up during drying;
    • reversibility: hide glue softens with heat, which means that parts or overlays can be readjusted if need be. Also, a little warm water enables you to take a part right off, even decades (or centuries!) later. This also is a great aid in solvent-free clean-up.
    • strength: as strong as many synthetics on oak and maple. It’s strength easily exceeds the strength of most woods you might be gluing.
    • consistency: because it is thinned with water and heat, it can be custom-mixed to the consistency you need for the job at hand.
    • creep-free: unlike synthetics, parts don’t slide around, and the glue doesn’t wick into places you don’t want it.
    • universal: effective on a number of materials, including paper, cloth, metal, felt, and wood. Traditionally used in adhering beize on writing slopes, and felt hammers on pianos; used by ancient jewellers to hold gold granules in place before permanently soldering or fusing.
    Hide Glue

    Hide Glue Clean-up

    When working with hide glue, we mix up only what we need in a small silicone bowl. We pour in some granules and cover them with water. About an hour later, we pop it in the microwave oven for about ten seconds, and it is ready! A brush is the best applicator, and it can simply be rinsed with warm water if it gets too gummy. When we are done, we simply let the leftover glue set in the silicone bowl: it peels right off, into the garbage, like the jelly it is. When working with larger quantities, we use nesting steel bowls as a double-boiler, on a mug warmer.

    Hide glue is an effective, and authentic, tool in any restorer’s shop. If you get over the mental hump of using it the first time, we are confident you won’t look back.

  • The Great Inkwell Experiment Part Six—Fourth-Week Results

    Inkwell Experiment Results Graph-Final

      1. glass well with a simple gravity-closing hinged lid;
      2. glass well with a silver snap-close hinged lid;
      3. metal well with glass insert and a hinged outer cover (thus with space between the insert and the cover);
      4. wooden well with glass insert and an unhinged cloth-lined wooden lid;
      5. glass writing-box bottle, with threaded brass lid;
      6. pottery ink bottle, with a new, replacement, cork;
      7. (control) plastic graduated cylinder, open;
      8. (control) modern glass ink bottle with plastic lid and synthetic lid liner (J. Herbin).

    The final results are in! (And great thanks goes to Sleepy at FPN for his work on tweaking the chart so that it is more readable.) Full data to date can be seen here.

    We are working on a full version of the experiment results, complete with data, chart, observations, conclusions, discussion, and more. We hope to be done in the next few days, so hurry back…

  • The Great Inkwell Experiment Part Five—Third-Week Results

    Inkwell Experiment Results Graph-Week Three

      1. glass well with a simple gravity-closing hinged lid;
      2. glass well with a silver snap-close hinged lid;
      3. metal well with glass insert and a hinged outer cover (thus with space between the insert and the cover);
      4. wooden well with glass insert and an unhinged cloth-lined wooden lid;
      5. glass writing-box bottle, with threaded brass lid;
      6. pottery ink bottle, with a new, replacement, cork;
      7. (control) plastic graduated cylinder, open;
      8. (control) modern glass ink bottle with plastic lid and synthetic lid liner (J. Herbin).

    Week three results are in! And it seems that I’m finally getting the hang of Excel (or, more specifically, how to make readable charts using Excel.) Full data to date can be seen here.

    As expected, the brass inkwell went dry last Saturday. Interestingly, even the modern, very effective, ink bottle is exhibiting some loss over time.

    And it seems that the time-honoured solutions of using natural products such as cork (the stopper for F) and wood (the case for D) are very effective. It reminds me of the Japanese chests, made of paulonia wood (the same wood as many traditionally-made Japanese kitchen knives). One significant characteristic of paulonia is that it absorbs huge amounts of water, very quickly. The reports are that, when caught in a flood, the drawers of these chests swell shut almost instantly, perfectly preserving the clothing inside them. It made me wonder if the wood of inkwell D is simply swelling shut enough to limit air exchange, and thus evaporation.

    In any case, one more week to go, and then on to conclusions and full data. Tune in next Friday…